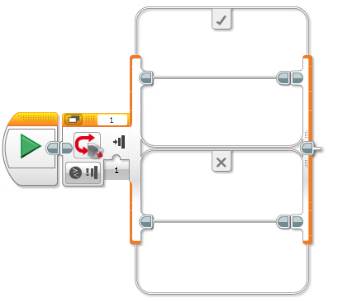
The switch block along with the loop and variable blocks are the core building blocks to any program. In this post we will cover the Switch block, how it works, its uses along with step by step examples.
What does the Switch Block Do?
The switch block is a conditional statement and in its simplest form, if the statement is true it can perform a set of logic and alternatively if the statement is false it can perform a different set of logic.
Depending on the mode selected there may be more than 2 cases (true or false), if for example the mode is set to Color | Measure | Color the case statement can have up to 8 statements (one for each color plus a “no color” option). We’ll cover this in more detail below.
What does the Switch Block Look Like?
The Switch block is accessed from the Orange Flow control palette and by default the Switch block’s mode is set to Touch Sensor | Compare | State. This is the simplest state for a Switch block i.e. it has 2 case statements:
- True = 1
- False = 2
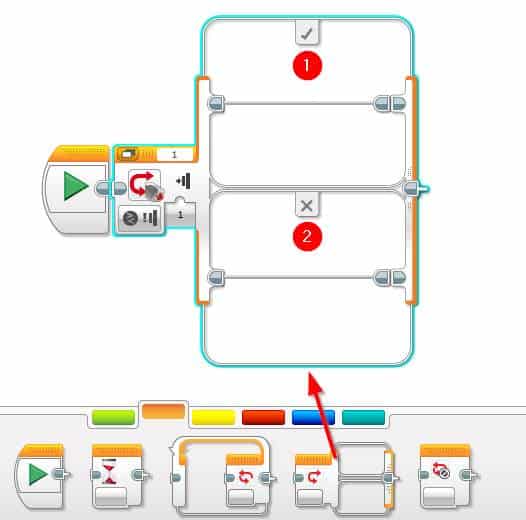
In regards to the Touch sensor’s state mode, if the touch sensor is pressed then it will pass a true to the Switch, otherwise it executes the false logic.
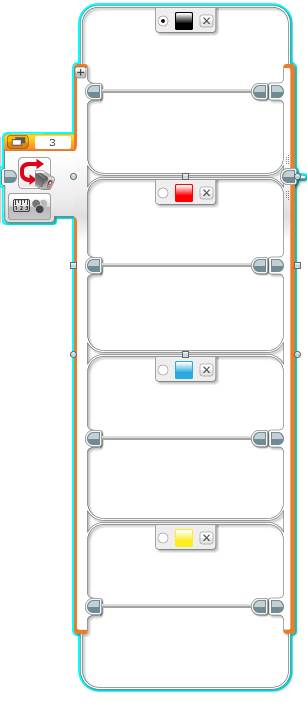
If the Switch block’s mode supports more than 2 choices (the color sensor for example), the case statements can be extended to support more options. The example below shows a switch which is contains a case statement for black, red, blue and yellow:
How to use Switch Block Views
The Switch block contains 2 ways of displaying its case logic:
- Flat View
- Tabbed View
The views do not affect the Switch block’s logic or performance in any way, they are purely visual and provide different ways of displaying the the case logic.
The view can be changed by clicking the view selector:
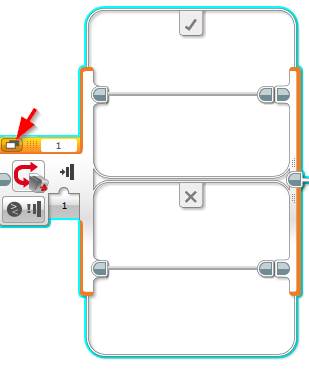
1. Flat View
The flat view is displayed by default and this view shows the case options vertically:
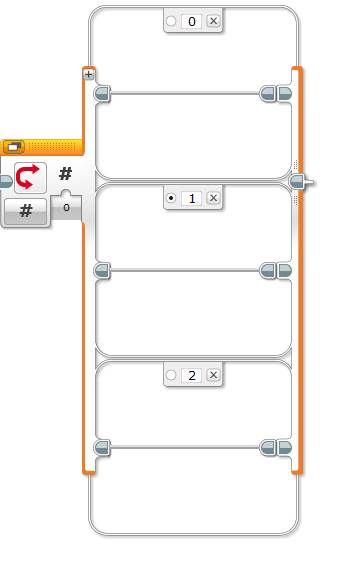
2. Tabbed View
The Switch Block’s tabbed view displays the cases horizontally and shows one case at a time. This view is my preference as it saves room on the programming canvas, but the downside is that not all cases are visible and they need to be clicked on to see what logic is inside.
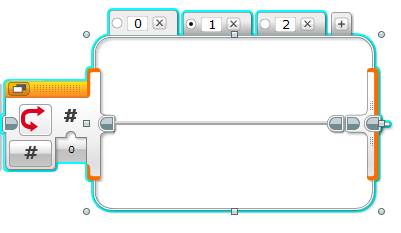
How to Add Extra Case Conditions to the Switch Block
If the selected mode supports more than 2 cases, new case conditions can be added by clicking the plus (+) button. Note that the plus button is in different places depending on the current view being used (as pictured below):
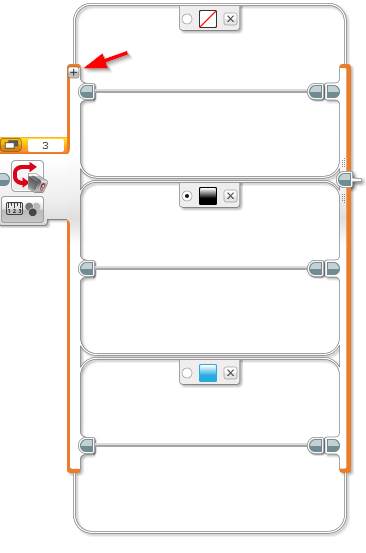
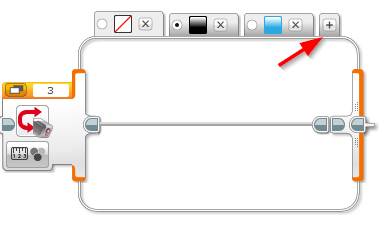
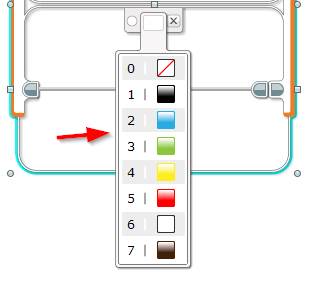
Once the new case is added, the condition check can be changed. This can be done by clicking on the red question mark and entering (or selecting) the appropriate option:

How to Delete a Switch Block Case
A Switch block’s case condition can be removed by clicking the “x” next to the condition. This same technique is used for either the flat or tabbed view:
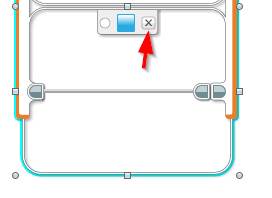
Once the “x” is clicked the case will be removed.
Note: The Switch block requires at least 2 case conditions in place and the delete option will not be enabled until the block contains at least 3.
What is the Default Case?
When a Switch block’s mode supports more than just a true or false case, a default case needs to be set. This default case will be executed when none of the case conditions are met.
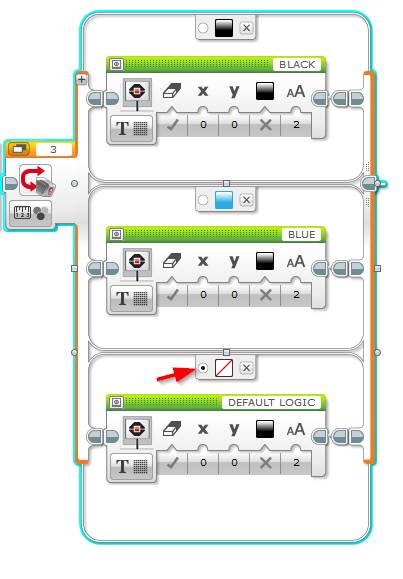
The default case is not obvious and has tripped me up a couple of times, so it’s worth noting it down. The Default case can be set by selecting the radio button on the case that needs to execute the default logic.
If for example I had a Switch block that was looking out for blue or black specifically from the color sensor I’d need a default case to take care of the logic if another color was detected. I could chose to either execute the blue or black logic, or as per below I’ve added a “No Color” option but it will be executed if any other color other than blue or black is detected due to the default radio button being selected:
Example Switch Block Programs
Now we have covered the basics of a Switch block lets get write some programs!
I recommend a simple robot build for all the following programs like the
Explor3r. It’s a quick and simple build that will only take 20 minutes. It’s also compatible with both the Education and Home Lego MINDSTORMS kits. The build instructions can be found here.
1. Touch Sensor and the Switch Block
For the first example lets create a program that will use the touch sensor and when the touch sensor is pressed the robot will move forward, when it’s not pressed the robot will stop. We’ll loop this logic for 20 seconds and then stop the program.
Before starting to code this program ensure the touch sensor is connected into port 1 of your robot.
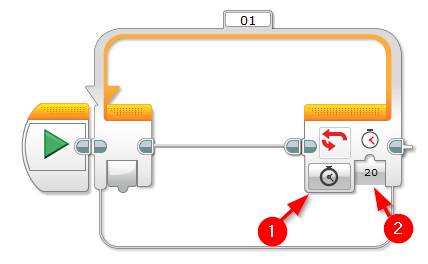
- Loop logic – run the program for 20 seconds
- Drag and drop an orange Loop block next to the start block
- Set its mode to Time Indicator and the seconds value to 20
- Add logic to check if the button is pressed
- Drag and drop an orange Switch block inside the loop
- Ensure the mode is set to Touch Sensor | Compare | State
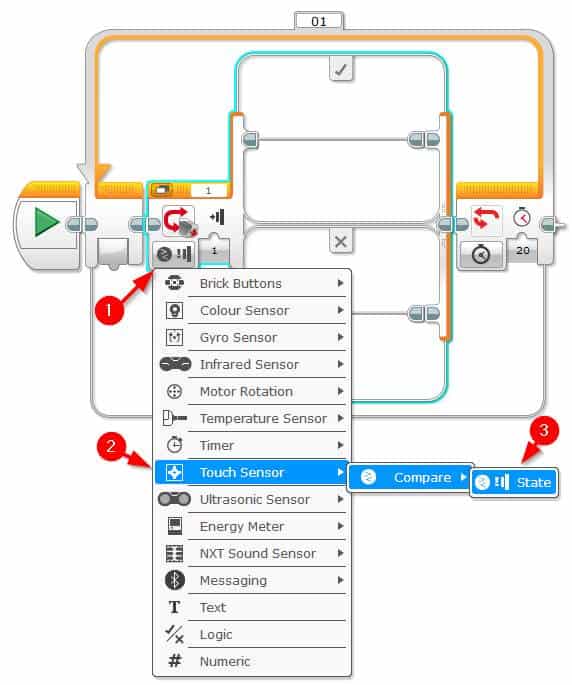
- Move the robot forwards if the button is pressed and stop it once the button is off:
- Move forwards:
- Drag and drop a green Move Steering block into the True (tick) case of the Switch block
- Set its mode to On
- Stop the robot
- Drag and drop a green Move Steering block into the false (cross) case of the Switch block
- Set its mode to Stop
- Move forwards:
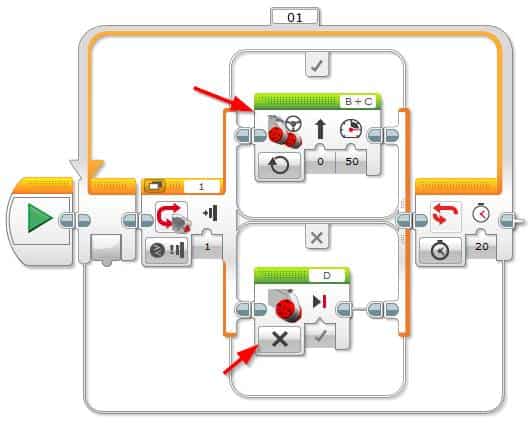
Now you are complete, click the download and play button to test out your work.
2. Color Sensor and the Switch Block
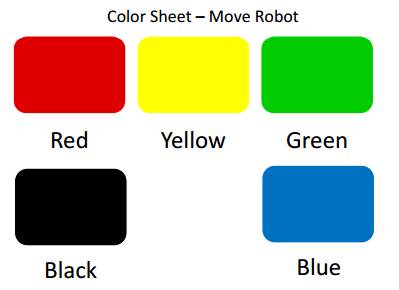
For the second example program lets use the EV3 color sensor along with the Switch block to move the robot. When the color green is detected the robot will move, when yellow is detected the robot will slowdown and red will stop the robot. Any other color will be ignored with our default case. We will also display the action name on the screen to see what case the program is currently using.
You can use the same robot as you did in the previous example, and plug the color sensor into port 3. Click here to download a complementary color sheet (FunCodeForKids.com – Move Robot using Colors.pdf) to use with this program:
- Loop logic – run the program for 20 seconds
- Drag and drop an orange Loop block next to the start block
- Set its mode to Time Indicator and the seconds value to 20
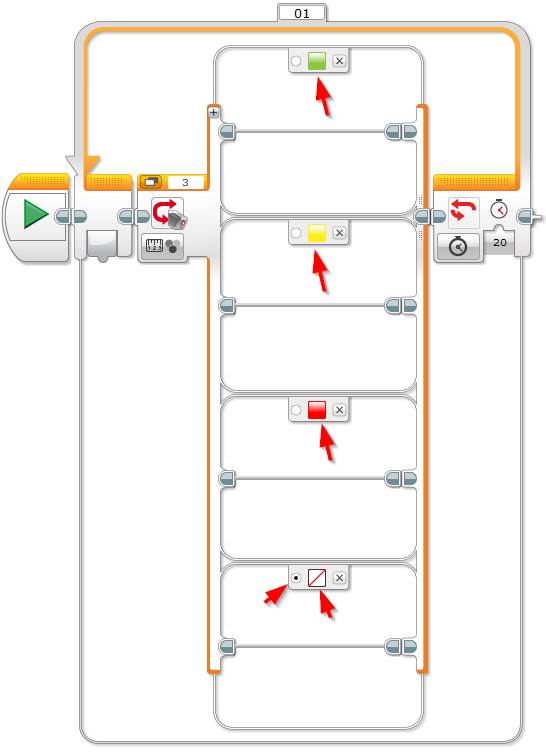
- Add the logic to check for the specific colors:
- Drag and drop an orange Switch block inside of the Loop block
- Set its mode to Color Sensor | Measure | Color
- Change the top color to green
- Change the bottom color to yellow
- Add a new case and set its color to red
- Add another case statement and set its color to “No Color”
- Mark this as the Default case
- Add logic to make the robot move
- Green:
- Drag and drop a green Move Steering block into the green case
- Set its mode to On
- Set its Power input to 75
- Drag and drop a green Display block into the green case
- Set its mode to Text | Pixels
- Set the text to Go!
- Drag and drop a green Move Steering block into the green case
- Yellow:
- Drag and drop a green Move Steering block into the yellow case
- Set its mode to On
- Set its Power input to 35
- Drag and drop a green Display block into the green case
- Set its mode to Text | Pixels
- Set the text to Slow
- Drag and drop a green Move Steering block into the yellow case
- Red:
- Drag and drop a green Move Steering block into the red case
- Set its mode to Off
- Drag and drop a green Display block into the green case
- Set its mode to Text | Pixels
- Set the text to Stop
- Drag and drop a green Move Steering block into the red case
- No Color:
- Drag and drop a green Display block into the No Color case
- Set its mode to Text | Pixels
- Update its text input to “No Action“
- Green:
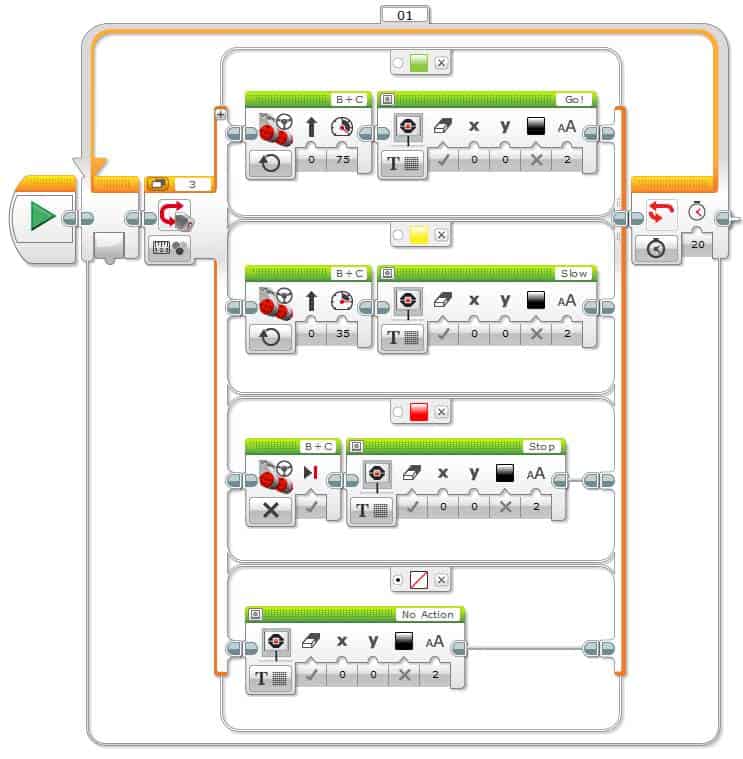
Scan the colors in our complimentary color sheet to test your program.
Thanks for reading this post, we hope you got something from it. Feel free to leave a comment if you have any issues or questions.
