
Welcome to the Fun Code for Kids EV3 Basic getting started guide. In this post we’ll cover the following topics. Feel free to use the hyperlinks below to jump into a particular topic:
- What is EV3 Basic?
- Installing Small Basic and the EV3 Basic Extension
- Microsoft Small Basic Interface Overview
- Programming Basics
- Program 1: Hello World Program
- How to connect and run an EV3 Basic program on the Lego EV3 Brick
- How to Stop an EV3 Program
- Program 2: Brick Information
What is EV3 Basic?
EV3 Basic is an extension for Microsoft Small Basic. Microsoft Small Basic is a text-based beginner programming language that is designed to be a stepping stone from block based programming (i.e. drag and drop, like Lego MINDSTORMS EV3 or Scratch) into a text-based language.
Small Basic is based on and inspired by an early variant of BASIC and Microsoft offer a free online version and also a free downloadable IDE. IDE stands for Integrated Programming Environment, simply put an IDE is the software you use to write and test code for a particular language.
Note: the online and the Windows Store version(V1.3) do not support the EV3 Basic extension.
The Small Basic IDE on its own will not give access to the objects needed to communicate with the Lego EV3 MINDSTORMS components, that’s where the EV3 Basic extension comes in. The EV3 Basic Extension is a separate, free install which adds useful EV3 objects and methods we can use to control Lego EV3 MINDSTORMS components.
Is Microsoft Small Basic Compatible with Mac OS?
The only way to run Small Basic on a Mac, Android or any other non-Windows machine is via the online version here. There is no downloadable IDE available.
Unfortunately the online version does not support adding extensions and therefore is not compatible with EV3 Basic.
Is Small Basic / EV3 Basic Compatible with Lego NXT?
The NXT brick has a different processor and firmware which does not make it compatible with EV3 Basic. The extension is only compatible with Lego MINDSTORMS EV3.
Install Microsoft Small Basic and the EV3 Basic Extension
Microsoft Small Basic Requirements
- Microsoft Windows 10, 8.1, 8, 7 or Vista
- .Net Framework 4.5
- This will need to be downloaded and installed for computers running Windows 8 and older. Click here for the .Net 4.5 installer from Microsoft.
How to Install Microsoft Small Basic
The steps below outline how to install Microsoft Small Basic:
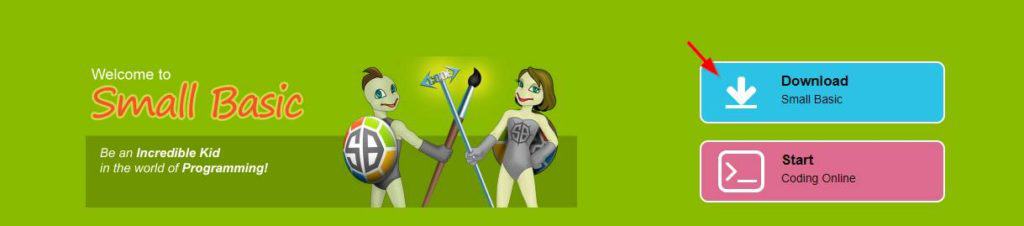
- Download Microsoft Small Basic IDE from the following website:
- Click the Download Small Basic button:
Note: the EV3 Basic is only compatible with version 1.2 (i.e. the Download from the site above), it’s not compatible with the online version or the Windows Store version of Small Basic (version 1.3).
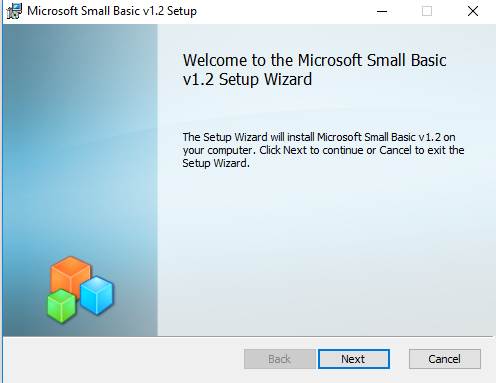
- Double click the downloaded msi file to start the installation
- Click Next
- Click the “I accept the terms in the License Agreement” checkbox and click Next

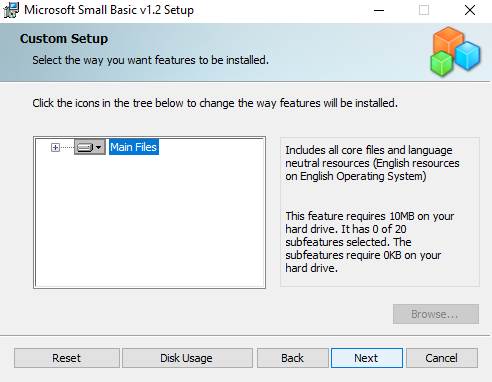
- Leave the Custom Setup options as default and click Next
- Click Install to start the installation process
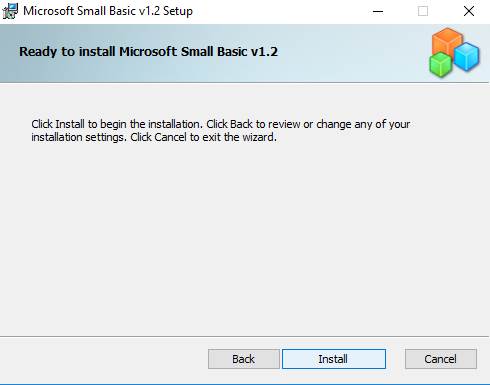
- Once the installation finishes click Finish

How to Install the EV3 Basic Extension
Now that Microsoft Small Basic IDE is installed it’s now time to install the EV3 Basic Extenstion.
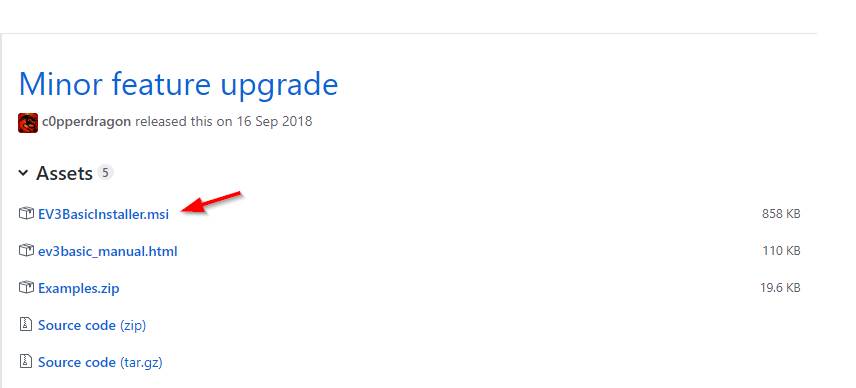
- Download the EV3 Basic extension from the following website:
- https://github.com/c0pperdragon/EV3Basic/releases
- Click the EV3BasicInstaller.msi file to download the installer:
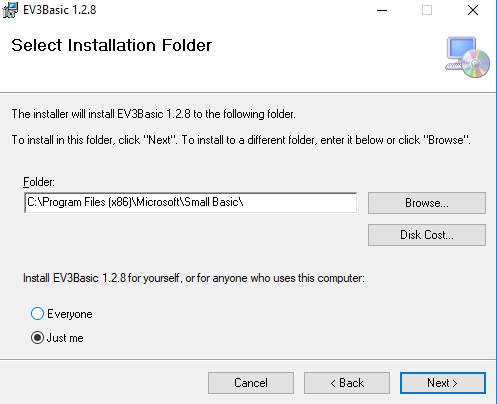
- Once it’s downloaded, double click EV3BasicInstaller.msi to start the installation and click Next

- If multiple profiles are to be used on the computer, click Everyone, otherwise go with the “Just Me” default.
- Also update the installation path if you prefer it to be installed to another drive other than C:\.
- Click Next
- Click Next to start the installation
- If prompted by Windows User Access Control (UAC) to give permission to the installer to make changes, click Yes
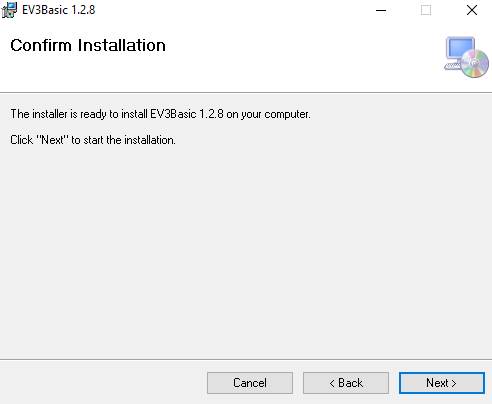
- Once the installation is finished, click Close
Microsoft Small Basic Interface Overview
Once the installation of the Small Basic and the EV3 Basic extension is complete load the program by clicking “Microsoft Small Basic” from the Windows start menu.
The image below outlines the Small Basic interface layout:
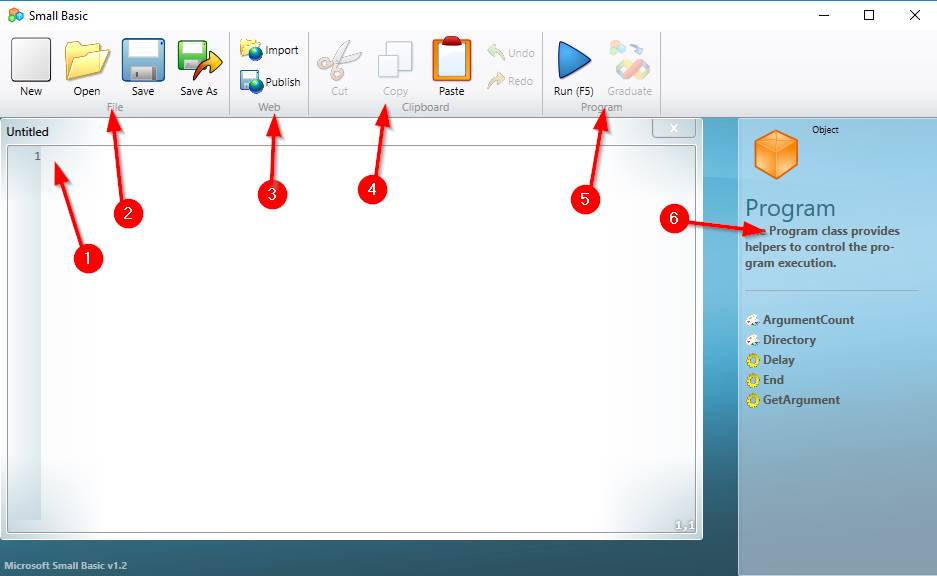
- Code editor window (write your code here, this is where the magic happens 🙂 )
- File functions:
- New: New code editor window
- Open: Open saved Small Basic program
- Save: Save the current program to a local disk or cloud drive
- Save As: Save the current program with a new name
- Web functions:
- Import: Imports a previously published program from the web. Note: you need to know the ID of the program you wish to import
- Publish: Publishes the current program up the the web (http://smallbasic.com/smallbasic.com/program). It will also give it an ID, this ID can be used to to import the program again.
- Editor functions:
- Standard editor functions: Cut, copy, paste, undo and redo
- Program functions:
- Run: This will compile and (if there are no compile errors) run the program. For EV3 basic, it will prompt to connect to the brick so that it can push the program to it and run. A shortcut for this is F5.
- Graduate: Export the current Small Basic program into a a VB.NET Visual Studio solution. Note: This will not work for EV3 Basic as the extension is not supported within Visual Studio.
- Contextual Help:
- Help information about the current object or method being typed, this changes as you type and is really quite handy!
Programming Basics
Last step before we jump into writing the first program. Let’s take a quick look into programming basics.
Small Basic Classes, Methods and Properties
When it comes to programming, the first thing to learn is the differences between classes, methods and properties. These definitions are not limited to just Small Basic but all object orientated programming languages whether that be Java, C# or C++.
The following link contains a complete reference for all Small Basic classes, methods and properties.
What is a class?
A class can be thought of as a collection of methods and properties pertaining to a single object. Wikipedia has a great analogy here for describing a class:
Think of a class as a car, it has various properties such as color, number of doors and shape. It could also have methods associated to it like move forward or move backwards and stop.
What is a Method?
A method in programming speak is a procedure that’s associated to a class. In other words it’s an action or a set of logic that the object is able to perform.
When writing code, the class is typed first, then a period and followed by a method or property. An example of a class and method in Small Basic is shown below – we use the Program class and the Delay method to pause the program for 1 second (1000 milliseconds):
Program.Delay(1000)
What is a Property?
A property can be thought of as a placeholder for data within a class. The placeholder (or field) can be either read-only (i.e. we cannot set it in code) or writable meaning we can set the value in code at run time.
Below is an example of a read only property named “Date”. This is a property of the Small Basic Clock class and will return the current date. We store it in a variable named CurrentDate:
CurrentDate = Clock.Date
EV3 Basic Classes and Operations
The description in the previous section also apply to EV3 Basic. Since EV3 Basic is an extension to Small Basic, it adds extra classes to baseline Small Basic that we can use to interact with our Lego MINDSTORM EV3 components. Click here to view the EV3 Basic reference.
An example EV3 Basic class would be LCD, this class gives us a bunch of methods we can use to interact with the EV3 Brick’s display. For example, we can use the following method (Circle) to draw a circle on the EV3 Brick’s display:
LCD.Circle (1, 50, 50, 50)
Commenting Code in Small Basic
In my opinion a good programmer will comment their code, but there’s a fine line between over commenting and not having enough comments. We don’t want to write a book, but at the same time we need to comment enough to ensure that when we (or another person) looks at the code, they can understand the logic. It’s good to get in the habit of commenting when starting out, as I find it also helps map out the program logic. For a complex piece of code, I’ll write out the comments for the framework first, then code up the logic.
I keep my comments to a single line and only do more than one line if the logic I’m writing is something out of the ordinary and needs some explaining.
We use a single quote ‘ to comment in Small Basic. You will notice that the text will turn green for comments. This makes them easily identifiable and easy to distinguish what text is part of the program and which text is not.
Here’s a sample comment:
  'Put a single quote at the start of the line, then type your comment:

  'Clear the the EV3 Brick display:
  LCD.Clear()
Give it a shot, open up a new Small Basic window and type a comment.
Writing Your First EV3 Basic Program
Now we have the prerequisites covered, lets get to the fun part – writing code! Like with all coding languages we must start with a “Hello world” program. So lets write a program that clears the EV3 Brick display and shows the text “Hello world”.
EV3 Basic Program: “Hello World”
If you have loaded Small Basic you should be already within a new code editor window, if not, click the New button in the top left to open one.
To interact with the EV3 Brick display we will use the EV3 Basic LCD class.
- By default when the EV3 Basic program is compiled and run on the Lego Mindstorms EV3 Brick, the display is not cleared. So the first step is to write code to clear the display:
  'Clear the the EV3 Brick display:
LCD.Clear()- The next step is to show the text Hello world on the display. We use the Write method to do this:
  'Write Hello World to the EV3 Brick display:
LCD.Write(0, 0, "Hello World")- Writing the text to the display is without a delay will flash the text to fast for us to actually see it. The next step in the program is to put in a delay long enough for us to see the text. Lets make the delay 4 seconds:
- To achieve this we’ll use the Program class and the Delay operation. The Delay operation takes a number which represents milliseconds. Click here for more information on the program class.
'Pause the program for 4 seconds to keep the msg on the display:
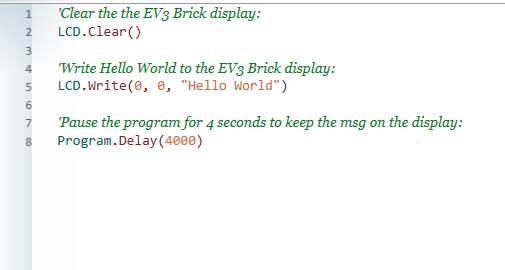
Program.Delay(4000)That’s it for our Hello World program. The full program should look like this:
  'Clear the the EV3 Brick display:
  LCD.Clear()

  'Write Hello World to the EV3 Brick display:
  LCD.Write(0, 0, "Hello World")

  'Pause the program for 4 seconds to keep the msg on the display:
  Program.Delay(4000)
Follow the steps in the next section to test and run your EV3 Basic code on the Lego MINDSTORMS EV3 Brick.
How to Connect the Lego EV3 Brick to Microsoft Small Basic
There are 2 supported methods for connecting the EV3 Brick to the Microsoft Small Basic IDE:
- Bluetooth
- Wireless
Connecting Small Basic to the Lego EV3 Brick via Bluetooth
The steps to connect the EV3 Brick to Small Basic and run EV3 Basic are outlined below:
- If the computer is not already paired with the EV3 Brick, then follow these instructions here (note pairing the EV3 Brick only needs to be only done once).
- To run the EV3 Basic code – from with the Small Basic IDE, either click Run or press F5.

- A new window will appear, click the appropriate COM port (mine runs on 5), this may be different on your PC’s configuration.
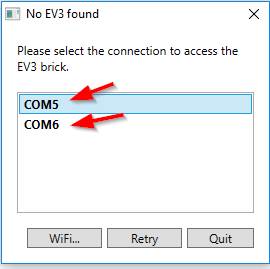
The code should now execute on the EV3 Brick.
Connecting Small Basic to the Lego EV3 Brick via Wireless
Connecting the Lego EV3 Brick to WiFi will need an additional WiFi dongle to connect the Brick to WiFi. More information on the WiFi dongle required and how to connect it to Wifi can be found in our EV3 Brick post here.
To connect Small Basic to the EV3 Brick to run EV3 Basic code via Wifi:
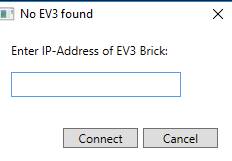
- Run the EV3 Basic code – from with the Small Basic IDE, either click Run or press F5.
- When prompted to connect to the EV3 Brick, select the Wifi.. button.

- Enter the EV3 Brick’s IP address and click Connect
How to Stop a EV3 Basic Program
If the program gets into an infinite loop and it needs to be stopped, then on the Small Basic window, click End Program button. This will stop the code running on the EV3 Brick and return the Small Basic IDE window back to the code editor.

EV3 Basic Program 2: Brick Information
For the final EV3 Basic introduction program we’ll use the LCD class again to display information about the EV3 Brick on the display. We’ll use the same logic as the first program to pause the program for 4 seconds so that we can see the information before the program ends.
- Create a new coding window by clicking the New button in the top left
- Clear the display:
LCD.Clear()
- Using the Text function display the information on the EV3 brick display. We’ll also use the EV3 class along with the following properties to get the brick information.
- Note the 2nd and 3rd numbers in the Text method tell the program where to place the text. You can see that I indent it by 5 for headings and 10 for the information.
'Print EV3 Brick information:
LCD.Text(1, 5,  1,  1, "EV3 Brick Name:")
LCD.Text(1, 10, 10, 1 EV3.BrickName)
LCD.Text(1, 5,  20, 1, "Battery Level:")
LCD.Text(1, 10, 30, 1, EV3.BatteryLevel)
LCD.Text(1, 5,  40, 1, "Battery Voltage:")
LCD.Text(1, 10, 50, 1, EV3.BatteryVoltage)
- Add the delay to the program so that we can read the output
Program.Delay(4000)
Hit the Run button to test the program, see if you can move and format the text better by using the X and Y components of the Text function (2nd and 3rd parameters).
Here’s the full program:
LCD.Clear()

'Print EV3 Brick information:
LCD.Text(1, 5,  1,  1, "EV3 Brick Name:")
LCD.Text(1, 10, 10, 1 EV3.BrickName)
LCD.Text(1, 5,  20, 1, "Battery Level:")
LCD.Text(1, 10, 30, 1, EV3.BatteryLevel)
LCD.Text(1, 5,  40, 1, "Battery Voltage:")
LCD.Text(1, 10, 50, 1, EV3.BatteryVoltage)

Program.Delay(4000)
That wraps up our EV3 Basic getting started guide, we hoped you got some useful information from this post and most importantly, we hope you had fun!
Feel free to leave a comment if you run into any issues or have any suggestions for EV3 Basic posts.